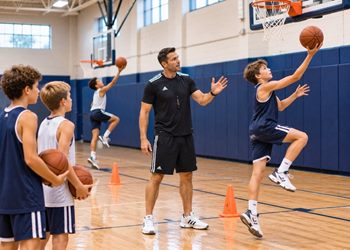
Watch your team warm up before Saturday's game and you would think every player can make a layup. Put one defender in the lane, though, and the same players travel, jump off the wrong foot, or rush an off-balance strong-hand scoop that clanks off the rim.
The good news is you do not need more conditioning lines to fix it. A skill sticks when practice looks like the game. Teach whole-part-whole: play, isolate one breakdown, then go back to live basketball. With a four-stage footwork progression, sharp verbal cues, and a 12-minute station blueprint, you can teach right- and left-hand layups this week without wasting gym time in long lines.
Why Layups Break Down in Games
In a game, players rarely get the slow, unguarded runway they see in a traditional two-line layup drill. When a defender closes out or trails from behind, two breakdowns show up right away:
- Wrong-foot gathers and shuffles: Players panic as they pick up the dribble, stutter their feet near the block, and either travel or launch off the wrong leg.
- Low, flat releases: Rushed by contact or a trailing hand, players push the ball from chest height on a flat line instead of rising up and placing it softly on the glass.
Traditional two-line layup drills hide both habits because there is no pressure and almost no coaching feedback between reps. As the BasketballXpert Coaching Team notes in Why do Basketball Practices Fail?, "Without concentration, the player is just going through the motions and maintaining the same flaw the basketball drill is attempting to fix or improve. We must provide feedback so players feel the difference between a correct repetition and an incorrect repetition."
Practice reps only build game-ready layups when players know the target and get immediate correction--high-rep lines without focus just lock in sloppy habits. As Footwork and Stance are the keys to being a good 1v1 basketball player reminds coaches, practicing movements incorrectly caps performance, while practicing them cleanly accelerates learning. Even in transition drills like Full Court Passing Drill to Layup, the coaching emphasis stays on clean footwork and refusing to let players travel on the finish.
The Step-by-Step Layup Footwork Progression
Before you ask youth players to attack full speed off the dribble, strip the skill down to its base. In The Importance of Footwork in Basketball, the BasketballXpert Coaching Team writes, "Good footwork and agility enhances every aspect of a basketball player's game and skills. It is the foundation of your entire game."
Start simple and add speed only after the rhythm is automatic, just as Beginning Coaches Should Focus on the Basics advises. A four-stage progression keeps the sequence clear--from zero-dribble steps, to a one-dribble gather, to live defense--though your players' age and coordination will dictate how fast you move from one stage to the next.
No-Dribble Two-Step Gather (Right and Left Sides)
Start every player three feet outside the lane, holding the ball with two hands at chest height. No dribbling yet--we want their brain focused entirely on the two-step takeoff rhythm.
- Right side: Step with the right foot, plant the left foot, and explode up off the left leg ("Right, left, up!").
- Left side: Step with the left foot, plant the right foot, and explode up off the right leg ("Left, right, up!").
- Knee drive: As the ball rises, drive the shooting-side knee toward the rim as if a string connects the knee and the shooting hand.
- What to watch: Look for a stutter step right before the first gather step, or players jumping off both feet when they meant to go off one.
- What to say: Keep your cues short and rhythmic: "Big step, plant, knee up!" or "Right-left-up!" If a player jumps off the wrong foot, stop them immediately, walk them back two steps, and have them feel the correct takeoff leg before moving on.
One-Dribble Attack Into the Gather
Once players hit five clean no-dribble makes in a row on each side, move them to the wing or elbow for a one-dribble attack. The goal is timing the ball pickup with the first gather step so they cover ground toward the hoop instead of stopping short and taking an extra shuffle step.
- Floor setup: Place a cone at the elbow or wing three-point line. Players start in triple threat, take one hard push dribble toward the block, and catch the ball with two hands just as their first gather foot (right foot on the right side, left foot on the left side) hits the floor.
- What to watch: Watch for players who pick the ball up too early--before the dribble pushes them past the cone--and then shuffle their feet to reach the rim.
- What to say: "Dribble-catch on step one!"
You can also feed this footwork out of a catch-and-drive action like The Basketball Star Shooter, where a player receives a pass on the move and drives straight into a layup. Keep the coaching lens on clean hands on the catch and balanced finishing form rather than rushing the shot.
Ball Protection, Eyes on the Square, and Weak-Hand Confidence
Clean footwork gets your player to the rim, but upper-body habits decide whether the ball goes in when traffic arrives. Teach three non-negotiables on every rep:
- Tuck the ball near the chin: On the gather, keep the ball high and tight near the chin with elbows out--never swing it down by the knees where help defenders can strip it.
- Drive the knee and aim for the top corner: Eyes lock onto the top corner of the backboard square on the shooting side, not the rim. Softly lay the ball high off the glass rather than firing a flat line drive.
- Lock in the weak hand: Youth players naturally default to their dominant hand, even on the left side of the floor. In Basketball 1v1 Roll, the BasketballXpert Coaching Team highlights this exact habit: "Players have a tendency to go to their strong hand everytime so encourage players to go left and develop skills."
When a player keeps switching back to their right hand on left-side drives, do not just tell them to "use your left." Have them place their right hand behind their back for two slow reps on the no-dribble gather so they feel the left-right-up rhythm with a left-hand finish, then add the off-hand back only as a guide on the side of the ball.
12-Minute Layup Station Blueprint for Practice
You do not need half of practice to rep this progression. As The Importance of Planning in Basketball Practices emphasizes, picking a focused topic and keeping players challenged keeps attention high. Pair that with the setup advice from Coach Chris Johnson and the BasketballXpert Coaching Team in Layup competition: "Having a ball for every player or pair, plus a few cones, keeps lines short and repetitions high."
Split your team into groups of 3-4 players per basket (using side hoops if you have them) and run four 3-minute rotations for a tight 12-minute block:
- Minutes 0-3 -- No-Dribble Gather (Both Sides): Players form two short lines just outside the lane with a cone marking the first gather step. Goal: 10 clean footwork makes per side (a make with wrong footwork does not count). Cue: "Big step, plant, knee up!"
- Minutes 3-6 -- One-Dribble Attack (Right & Left Wings): Move the cones to the wings. Players take one hard dribble, catch on step one, and finish high off the square. Goal: 10 clean makes per side with chin-tuck ball protection. Cue: "Dribble-catch on step one!"
- Minutes 6-9 -- Timed Weak-Hand Challenge: Run 1-minute timed rounds modeled on Layup competition, requiring left-hand finishes only on the left side. Players count their makes in minute one and try to beat that score in minute two. Cue: "Eyes on the top corner!"
- Minutes 9-12 -- Guided Defender Finishes: One coach or teammate stands in the lane with a pad or raised hand--not blocking shots, just forcing the finisher to tuck the ball at the chin and finish high off the glass. Goal: 10 clean finishes per player before rotating. Cue: "Chin it, finish high!"
This blueprint keeps players moving with minimal standing around, though you will still need to step in quickly with feedback whenever a group starts rushing reps just to beat the clock.
Taking Footwork Back Into Live Basketball
Part practice only sticks when you test it against real decisions and real defenders. Close the whole-part-whole loop by putting players back into live 1-on-1 and 2-on-1 advantage situations where they have to read help defense at game speed.
- Shadow-to-Live Progression: Use the structure from Fake Shot or Fake Pass and Take to the Hoop, progressing from a shadow defender (no contact), to 50% pressure, to 100% live defense as the offensive player drives the lane.
- Mid-Court 1v1 Attack: Run 1v1 basketball game, starting the offensive player at mid-court against a defender at the free-throw line for two possessions. Add a trailing chaser from behind on half the reps so players learn to keep their two-step rhythm at full speed without rushing the release.
- 2-on-1 Advantage Reads: Put two offensive players against one defender in the lane. If the defender commits early, the ball handler keeps their two-step stride and finishes; if the defender walls up at the last second, teach the driver to convert into a two-foot jump stop to stay on balance, pivot, or dump off a pass.
You do not need a complicated playbook to fix game-day travels and missed layups. A skill sticks when practice looks like the game--play, isolate one breakdown with clear footwork cues, and go right back to live basketball. Run this four-stage progression and 12-minute station block once or twice this week, and you will see calmer gathers, stronger weak-hand finishes, and far fewer wasted possessions on Saturday.